Uploaded by deactivated8aea56b5d 


2560x7680 JPG 3.05 MB
Interested in advertising on Derpibooru? Click here for information!

Help fund the $15 daily operational cost of Derpibooru - support us financially!
Description
(Warning: Description is not mine.)
Yay! Finished! :D
Rather than post up the final final version, I figured I’d start off with some comparison shots to really highlight the benefit of this medium. ^^
As some of you might recall, I drew the following faux cel “painting” during the blackout, while experimenting with a layered physical drawing technique:
[link]
It was crude and, in retrospect, a little ugly… but it was a nice effort given the limited resources at the time (mainly no light and no proper drawing tools, having gone mostly all digital), and it certainly laid the foundation for new opportunities. The most important thing was that because of the layered approach, the original sketch was still left intact, so I could work off of it. ^^
After trying and failing with fancier markers, I finally opted to settle with the traditional painting method used for production cels… that is, REAL paint. I talked a little about my first attempts here:
[link]
And so to really set things in motion, I opted to return to the original DD drawing and try to redo it with the traditional painting style… with the exception being that I would still use two transparency sheets rather than one. There’s something about being able to keep fills and strokes separated that I like… maybe because I grew up with the mindset thanks to all that digital art. ^^;
This time around I used masking tape to hold both transparency sheets together, avoiding any of the position shifting that happened with the prototypes – I also used at least three coasts of paint to really get the colours nice and solid (although try as I might, dat yellow simply refused to opaque over…. and it’s not even the right colour yellow!) I also DID try to use a bendable ruler with the lineart to keep lines nice and neat, but at some point I got impatient and tossed it aside, wobbliness be damned! XD
There was still some mistakes committed, especially with some stray paint strokes bleeding off the edges, but overall I LOVE the result. Not just because of the painting itself, but the new possibilities now open. Even now, I’m salivating at all the new things I could do with production cels. .
A quick explanation of each picture:
Yay! Finished! :D
Rather than post up the final final version, I figured I’d start off with some comparison shots to really highlight the benefit of this medium. ^^
As some of you might recall, I drew the following faux cel “painting” during the blackout, while experimenting with a layered physical drawing technique:
[link]
It was crude and, in retrospect, a little ugly… but it was a nice effort given the limited resources at the time (mainly no light and no proper drawing tools, having gone mostly all digital), and it certainly laid the foundation for new opportunities. The most important thing was that because of the layered approach, the original sketch was still left intact, so I could work off of it. ^^
After trying and failing with fancier markers, I finally opted to settle with the traditional painting method used for production cels… that is, REAL paint. I talked a little about my first attempts here:
[link]
And so to really set things in motion, I opted to return to the original DD drawing and try to redo it with the traditional painting style… with the exception being that I would still use two transparency sheets rather than one. There’s something about being able to keep fills and strokes separated that I like… maybe because I grew up with the mindset thanks to all that digital art. ^^;
This time around I used masking tape to hold both transparency sheets together, avoiding any of the position shifting that happened with the prototypes – I also used at least three coasts of paint to really get the colours nice and solid (although try as I might, dat yellow simply refused to opaque over…. and it’s not even the right colour yellow!) I also DID try to use a bendable ruler with the lineart to keep lines nice and neat, but at some point I got impatient and tossed it aside, wobbliness be damned! XD
There was still some mistakes committed, especially with some stray paint strokes bleeding off the edges, but overall I LOVE the result. Not just because of the painting itself, but the new possibilities now open. Even now, I’m salivating at all the new things I could do with production cels. .
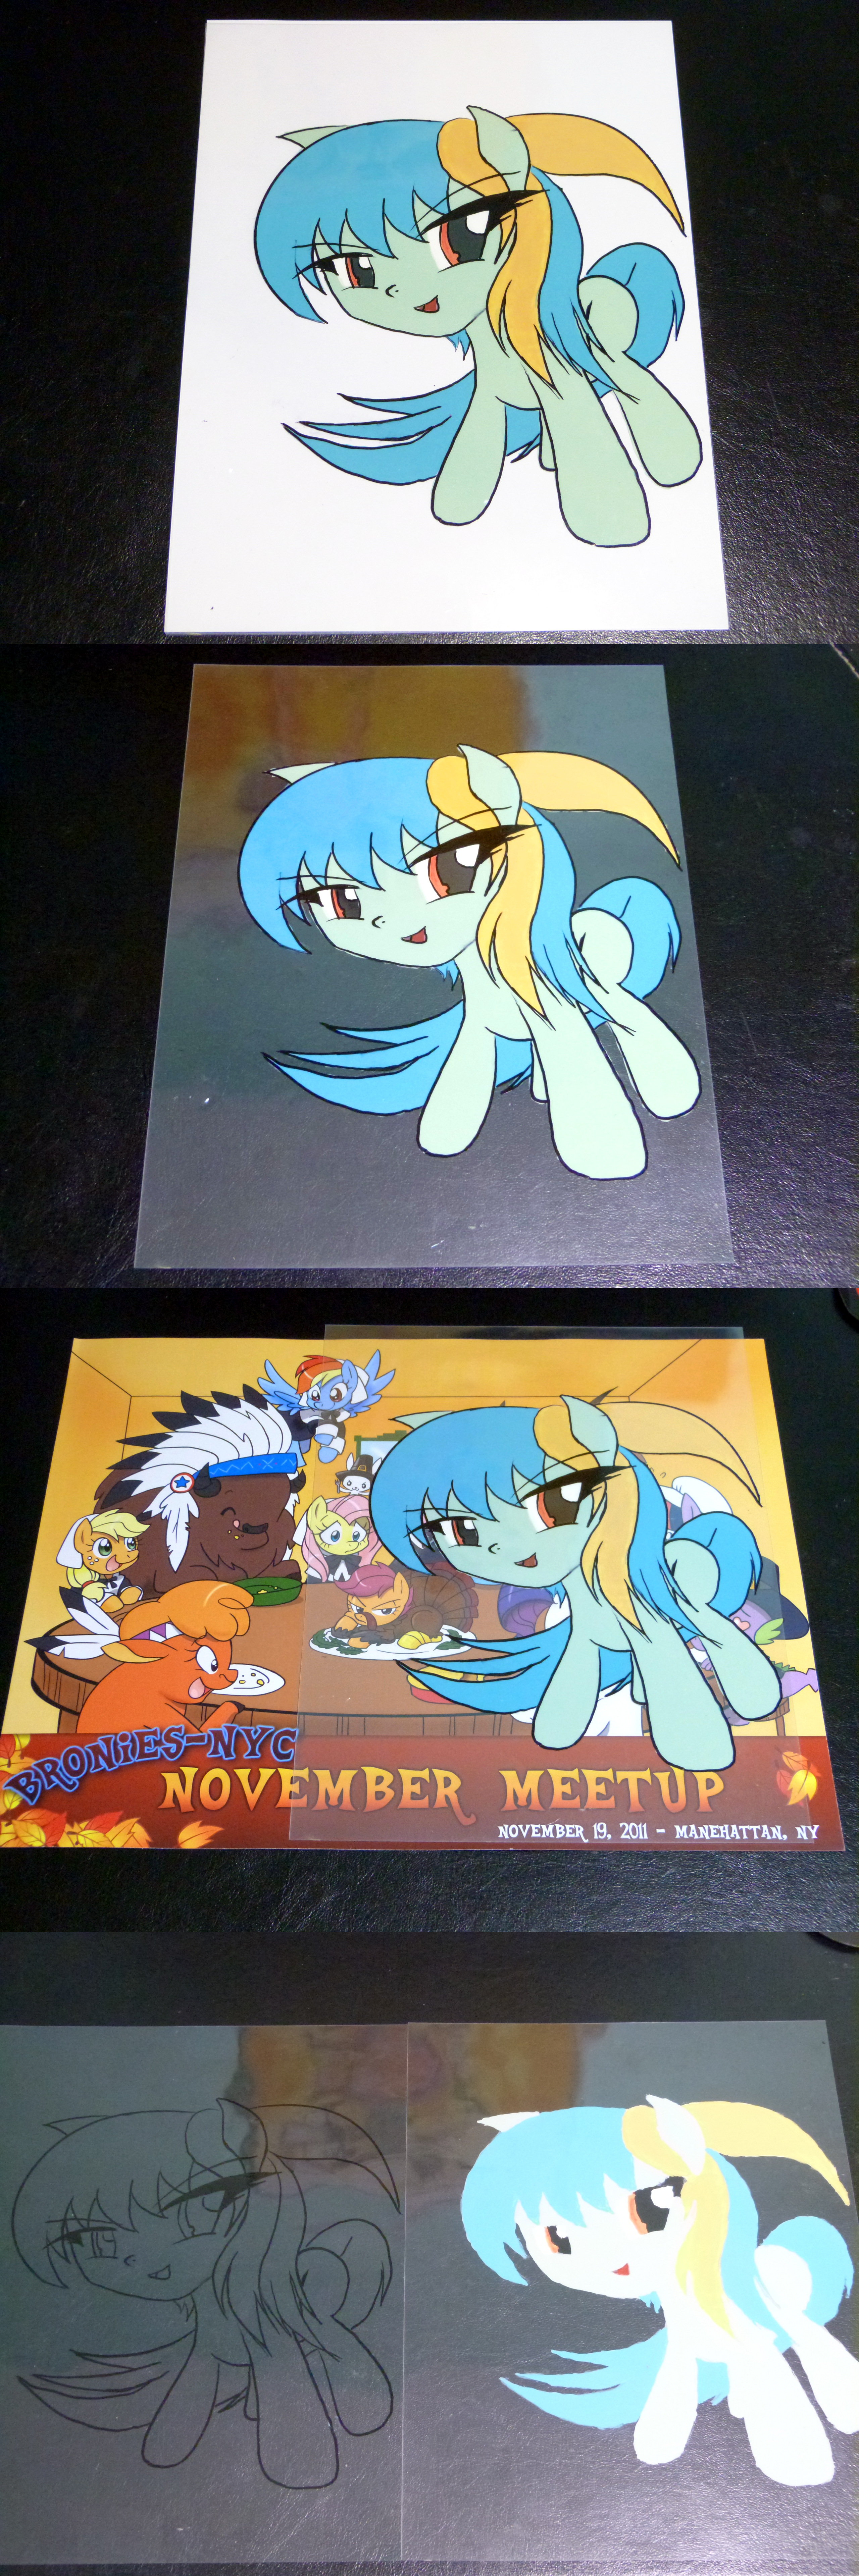
A quick explanation of each picture:
- The first one is just the completed DD over a bright white heavy cardstock. White paper definitely helps embolden the colours and hides the occasional defect, but it doesn’t really let you appreciate the work done by the white paint.
- The second one, in contrast, are just the bare streets over my work surface… the black textured surface, and the glowing sheen from the camera light, really helps to draw attention to the transparency sheet and what it can do to provide DD with any background imaginable. True a lot of the defects are visible here,… I figure a tiny brush with some polish remover could always fix things… if only I actually HAD polish remover – but I could probably take care of that later, or leave as is for the historical benefit. ^^
- Speaking of which, next we have DD over a REAL background… a poster I bought from my first-ever meetup, made by my friend :iconchibi-jen-hen: and which can be found here: [link]
She almost looks like she could be part of the illustration (and in person, she blends even more naturally), and again opens the door to new possibilities. :)
- Finally, just a quick shot of the lineart layer and coloured layer separated. In theory, it should now be possible to create a shaded or highlighted layer too with these acrylics, and that’s something I’d love to give a shot in the near-future. ^^
And that’s about it. ^^
Some thing I feel that I need after all this are even tinier brushes (for the really small details) and some large jewelers magnifying glass to let me get up close and personal with those edges. A thin edger of some kind would be useful too, so even if my brush accidentally strays outside the line, the edger would just block off any paint.
But that aside, though, I think I found something else I want to do. :)
True, there are transparency sheets that work with printers, which would simply allow me to “print” up some production cells. But somehow, I’ve lost interest in digital shortcuts like that, perhaps because they all failed me during a time of need, while all my physical tools were there to comfort me with productivity, rewarding challenges and fond memories.
And part of the fun for me is to match or surpass digital art with physical methods, and with this cel method I have a good shot at it. __
Comments
0 comments posted